If you’re considering building a shed base on uneven ground, STOP! When considering adding a shed to your garden it’s really important not to rush into it because it’s not as simple as erecting your shed and Bob’s your uncle.
The introduction of a shed to a garden takes preparation and planning. Firstly, you should think about where you want your shed to be positioned and then you need to consider the ground conditions and the method and degree of preparation which will be required before installation.
We really can’t stress enough how important it is to construct your shed on level ground. Building a shed base on uneven ground can cause a lot of problems and can even cause your shed to fall down. Not only that, uneven ground allows gaps to appear in your shed base and other ground protection, consequently allowing moisture, bugs and other factors to increase the risk of damage to your shed.
How to Level the Ground
1) First of all, you need to mark out the area (this area should be the total size of your chosen plastic shed base, bearing in mind our Shed Base panels are 13″ square). It’s helpful to drive wooden stakes or bamboo canes into the corners of the area and then join these together using string.
2) Remove the grass, vegetation and any rocks covering the area – a standard garden shovel should be fine for this job. Usually a depth of half a spade will be adequate but if your ground is squidgy or soft, it would be recommended to dig a little deeper up to 1 full spade depth.
3) Remove all topsoil from the marked out area as this is usually quite soft and could shift under the pressure of the shed if the ground is not prepared properly. Top soil is typically dark brown so you should dig down until only a lighter coloured soil can be seen across the whole area.
4) Now you need to work out how and where the ground is uneven. This can be done by laying a plank across the area which will highlight any peaks or troughs in the soil. Soil can be moved from one area to another to either “shave off” the peaks or fill in any divots.
5) Once you’ve levelled out the subsoil, it’s time to relay the top soil across the surface ensuring this remains completely level.
6) Rake the soil and break up any solid lumps in the process. Do this until the surface is smooth and flat.
7) Next use a ground tamper, vibrating whacker plate or other heavy, flat object to compress the soil. You should continue to go over the area until the soil stops compressing when struck.
8) You have a number of choices when it comes to working out whether the ground is level. There is of course the spirit level, use this on each edge and in the centre of the area to establish whether all is fine. You can use the plank again to ensure that the area is level across longer distances. The area should be checked in all directions to ensure it’s totally flat.
9) Install a weed blocking membrane over the surface such as our woven landscaping membranes and peg it down to make sure it stays where it has been installed.
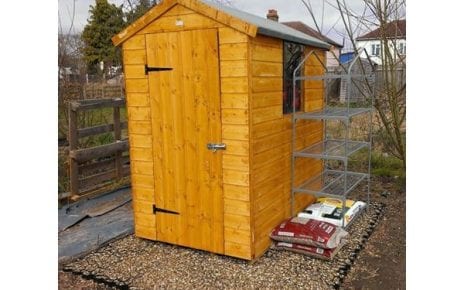
10) Now you’re in a position to lay your plastic shed base.
How to Assemble Your Shed Base
Our plastic shed bases are renowned for their ease of installation thanks to a simple interlocking fixing method, meaning that no extra fiddly clips are needed to attach one panel to the next.
Each panel fits snugly into the next to create a sturdy and durable yet lightweight base for your shed. Once all of your panels have been connected, we recommend the panels are filled with loose gravel to add to the strength and stability of the base. This is optional and panels left unfilled will help air to circulate beneath the shed floor, reducing the risk of rot from moisture below the shed itself.
Why Our Plastic Shed Base Panels Are the Best
Our plastic shed bases are made from 100% recycled plastic which ensures the base is not only environmentally friendly, but also that it lasts for the life of your shed.
Each panels is resilient against UV and weather damage, able to withstand the changes of the seasons as well as regular fluctuations in temperature.
Despite their strength and durability though, it’s imperative that our panels are laid on level ground only in order to guarantee the avoidance of breakages.
Each of our panels are 330mm square (13″) and 40mm deep (1.6″) and each panel lends itself to be interlocked into an unlimited amount of panels to cover any size area. The panels have a load bearing capacity of up to 420 tonnes per square metre, even when they’re not filled with gravel.
To put that into perspective, you can sit 50 elephants on a square metre of our shed base before the plastic will bend and break. Essentially, this means that should you wish to use your shed to store the heaviest of landscaping equipment, you can be safe in the knowledge that your shed base will remain sturdy.
The number of shed base panels required will depend entirely on your project so we give the option of individual, bulk or full kit purchases to cover all bases. If you choose to purchase a shed base kit then not only will you receive the specified number of panels, you’ll also get the protection membrane and a number of fixing pegs too.
Instructions are included with all shed base purchases to ensure a safe, easy installation. They will also give you pointers on how to prepare the area you’ve chosen for your shed to sit.
Now, you’ve got everything you need to get started levelling the ground ready for the installation of your perfect shed. As always, our team are on hand to answer any questions you may have so feel free to get in touch.
Will your bases support a large metal shed, say, 12′ x 12′ or thereabouts?
Hi Michael, Thanks for the comment. Our base will be able to support a large metal shed. Our bases can hold up to 420 tonnes per square metre.
So I guess you can not use these if you are building on a “sloping ground” instead of uneven???
Hi Lou, thank you for your comment.
We would not recommend installing a shed or other garden building onto a sloped area. Our bases can still be used on inclines but requires you levelling the current ground by digging into the slope. You can see an example of this in an 8ft x 6ft Shed Base Blog.
Hope this helps.