With summer quickly approaching and the sun creeping out from behind the clouds, now is the perfect time to get your garden sorted for the foreseeable future. With possible BBQ’s or just some lounging around on the horizon, there is no better time to get yourself a brand new shed. You can store all of your gardening tools, deck chairs, fold-out tables and maybe even toys in there! With that good of an investment waiting to be claimed make sure you get your wooden or metal building of opportunity the correct foundations to have the best chance of surviving for years to come. In this case study, Shouvik has just ordered his Shed and needs a base, read on to see what he did decide on.
Jump To:
| The Project | The Work | Conclusion |
The Project
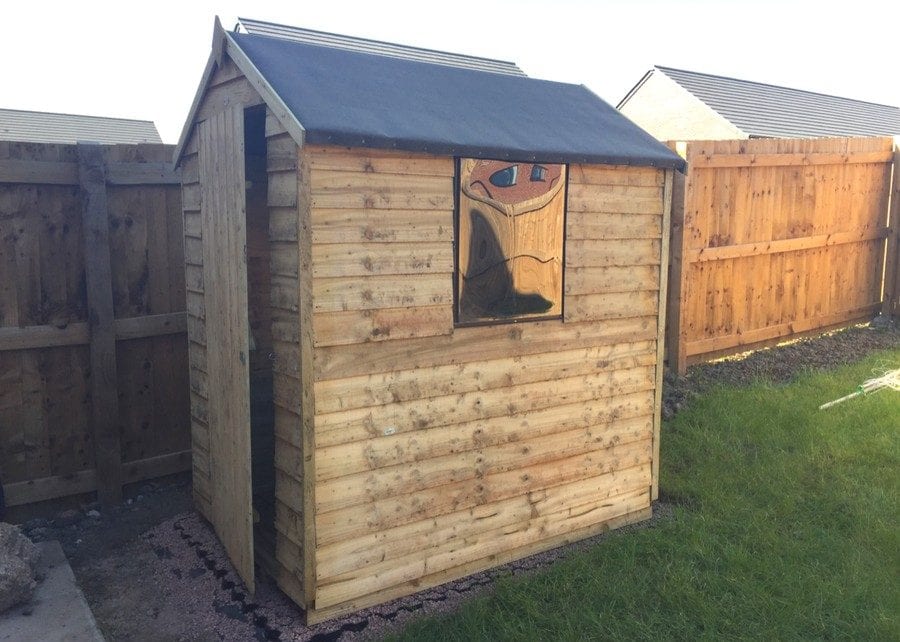
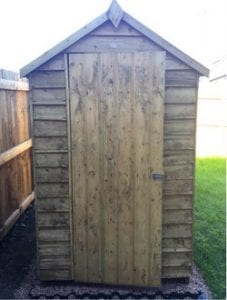
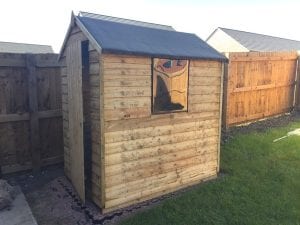
Shouvik got in touch with us towards the end of April after ordering himself and his family a new 6ft x 4 ft Garden Shed from ShedWorld. Since the shed was already being processed by ShedWorld he needed a base solution that was not only strong but was quick and easy to lay by himself, which is when he found our website and began to browse. The same day Shouvik ordered a 6ft x 4ft Shed Base Kit, which includes a Geo-Textile Membrane and 5 U-Pins to secure the membrane into the ground.
Ordered on Tuesday evening and dispatched Wednesday morning, Shouvik received his base kit on the Friday in easy to manage boxes enabling him to easily store them until he was ready to lay the base.
Along with the base, membrane and u-pins he required just a few more materials to ensure the job would be completed well. He bought sharp sand to create a sub-base, from Homebase and decorative gravel to fill the base, from Wickes. These can be bought from any good builders merchant.
The Work
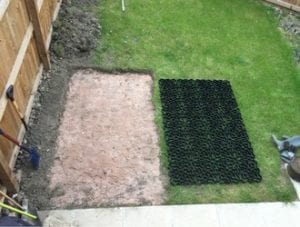
As with all projects a plan was put in place by Shouvik to get his base laid and ready for when his shed arrived. To start, he outlined the 6ft x 4ft area where the base and shed would be on his current lawn. From here the turf and soil inside that area was dug up, removed and disposed of responsibly. This left a rectangle area, around 60mm deep.
From here Shouvik laid a thin layer of sharp sand in the base area and compacted it down by repeatedly walking over it whilst wearing a pair of boots to ensure it was a solid foundation on which to stand his base. With the sharp sand now a solid sub base, Shouvik then laid the membrane in the base area and secured this into the ground to make sure there would be no movement using the metal u-pins that are included in our Shed Base Kits.
Now it was time to lay the base, he easily unpacked the base panels and began to lay them in place. Starting in one corner and easily attaching one panel at a time. He told us how easy the base was to lay, he said “I did consider a wooden shed base or paving tiles etc.; but decided to use your plastic shed base as it is cost-effective and very easy to install“. The laying of the base turned out to be the easiest part of the project.
Finally, the base is filled with decorative gravel to improve its looks. Around 8kg of gravel is needed to fill each panel of the Shed Base.
Conclusion
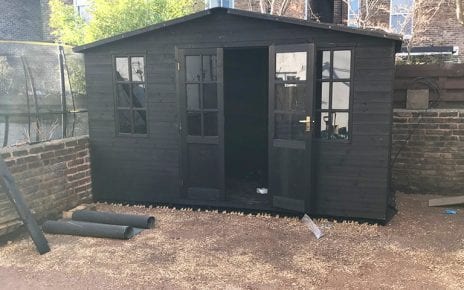
As you can see from the photos of Shouvik’s photos, his shed looks great and is in safe hands stood on our base. He told us that he is “happy and would be likely to recommend us to others“.
We would like to say a huge thank you to Shouvik for the photos and the information he provided us to be able to create this case study.
Should you have any questions regarding a project or our bases then please do not hesitate to contact us.
The plastic base looks easy to do but with holes in each block how can you put metal shelving up will the legs not fall through?
Hi Brenda,
Thanks for your comment. There are a few ways to ensure this does not occur. Option 1 is to fill the base with gravel before installing the shed. You can choose to only fill the sections of the base where the shelving legs will be stood or you can fill the entire base. Option 2 is to lay a Wooden Ply Board on top of your plastic base to stand the shed on. Option 3 is to use some of our Rubber Tiles that sit in the plastic base that you could install the shed on top of.
Hope this helps.
Callum