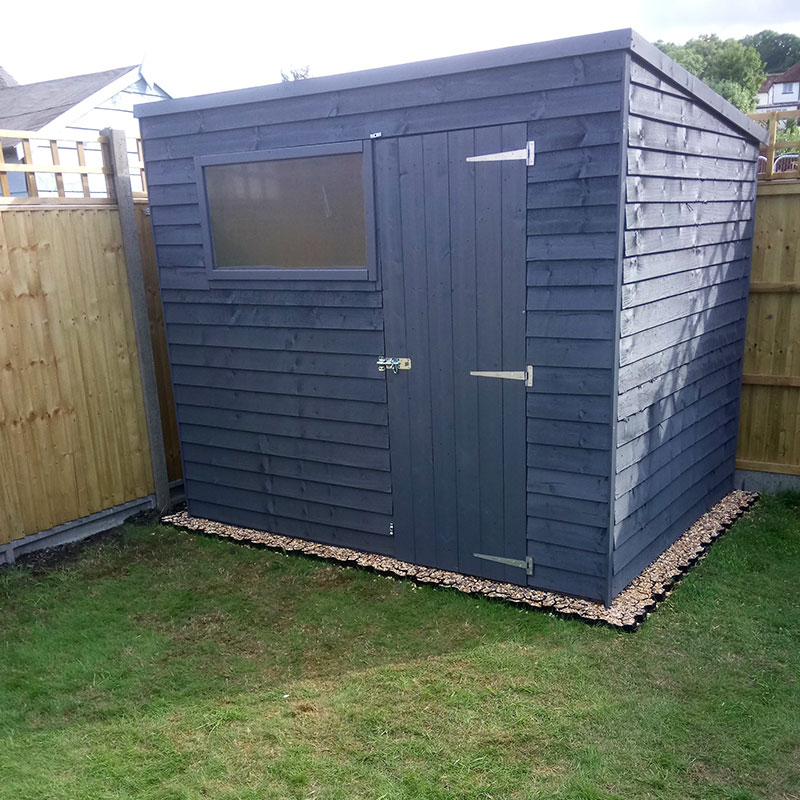
8ft x 6ft Plastic Shed Base Installed Under Sheds Warehouse Shed
This case study comes courtesy of Mark who had recently purchased himself a brand new wooden storage shed from Sheds Warehouse for the corner of his garden. He did consider laying a concrete base but wasn’t happy with the labour intensive process involved with laying a concrete foundation. With that in mind, Mark decided to find an easy to lay foundation. Read on to find out what product Mark decided to use:
Choosing A Plastic Shed Base
Knowing that he wanted a strong yet easy to lay base for his shed, Mark began searching online for a suitable foundation. After a little browsing he came across our website and our fully recycled plastic shed bases. He began reading up on its many benefits such as:
• Easy to install: thanks to its specially designed slot and peg system,
• Very strong: able to hold up to 420 tonnes per sqm when unfilled,
• Permeable: open structure allows water to drain away naturally. If water does not drain away like with concrete, it can be absorbed by the shed and lead to rotting.
• Weather & UV Resistant: does not fade in sunlight and can withstand high and low temperatures.
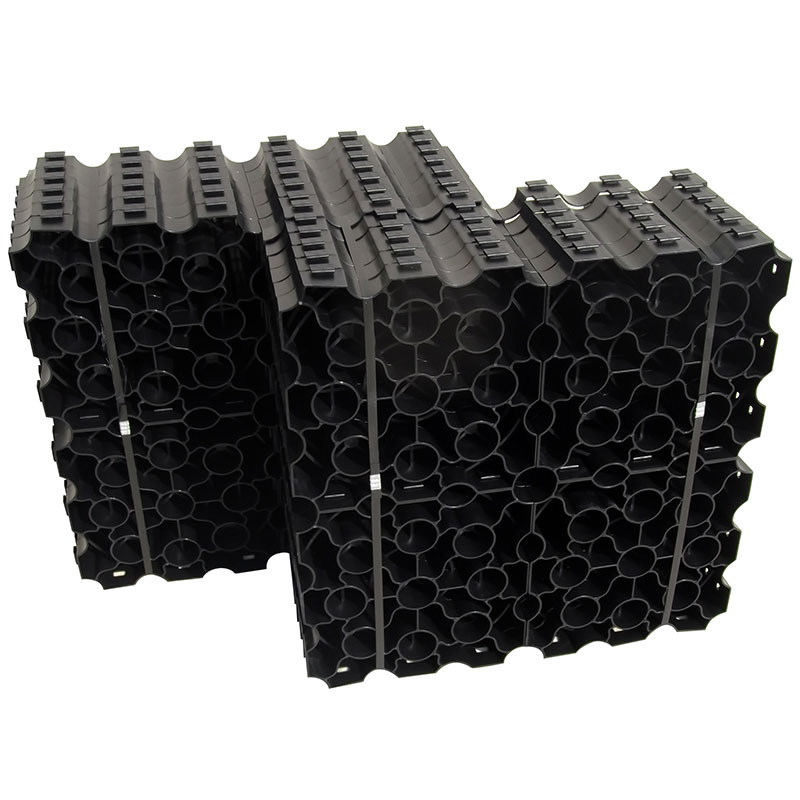
After discovering that our base carries the mentioned benefits and more, Mark decided to order an 8ft x 6ft Plastic Shed Base Kit which was dispatched the next morning and arrived the following day.

Installing Plastic Shed Base
Mark’s base arrived in two easy to manage boxes that he could simply move and store until the day of install. Once, the day did arrive, Mark began by marking out his 8ft x 6ft area in his designated area using string. Although we do not recommend it, Mark decided against performing any prior ground preparation and to instead lay his base straight onto his grass.
He started in one corner and laid one shed base panel at a time simply connecting each piece of his base together as he went along using the slot and peg connecting system mentioned earlier. He continued to repeat this process until he had installed his full base which was a very quick process.
From here, Mark filled all of his base with angular gravel. We estimate that around 8kg of gravel is needed to fill each panel so from that you can work out roughly how much you will need to fill your full area. Again this took almost no time to finish and with that Mark had created his plastic shed base.
All that was left to do was to have his new shed installed and begin to enjoy it!
Conclusion
A big thank you to Mark for sharing the photos and information of his project to allow us to create this case study. Mark is incredibly pleased with his new plastic shed base and shed. He now has a new wooden storage garden building on a strong, permeable plastic foundation which will help prolong the life of his new shed.
Mark told us “I am very pleased with my plastic shed base and new shed. Your base is great and has lots of benefits, one of the main things was the base saved me was time (instead of having to dig out the area out and having to mix a concrete footing), as well as not having to dispose of a lot of dug-out earth and grass! The shed was easy to put up and is solid. It took a bit of time to give it 3 coats of cuprinol, but was worth it.”
If you have any images of your project to share with us or have any questions regarding our products then please do not hesitate to contact us.