Fire Bowls For Cooking
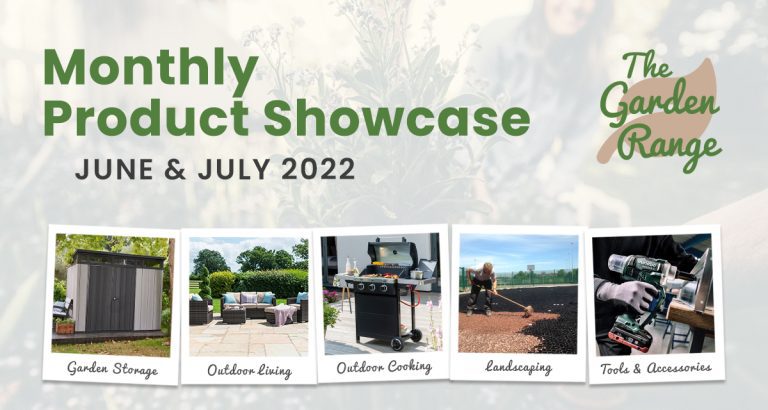
Product Spotlight – June & July 2022
Browse June & July’s showcase products from our Outdoor Living, Garden Storage, Outdoor Cooking, Landscaping & Tool ranges!

Browse June & July’s showcase products from our Outdoor Living, Garden Storage, Outdoor Cooking, Landscaping & Tool ranges!

Browse May & June’s showcase products from our Outdoor Living, Garden Storage, Outdoor Cooking, Landscaping & Tool ranges!
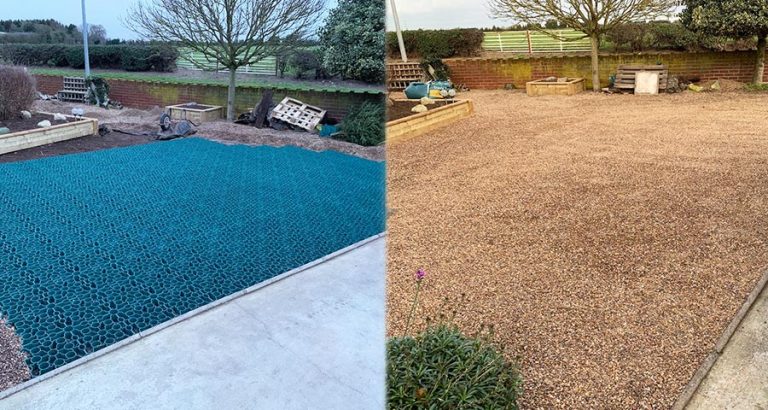
A case study from a past customer, Paul who decided to extend his current drive using green X-Grid to create a strong and permeable gravel driveway
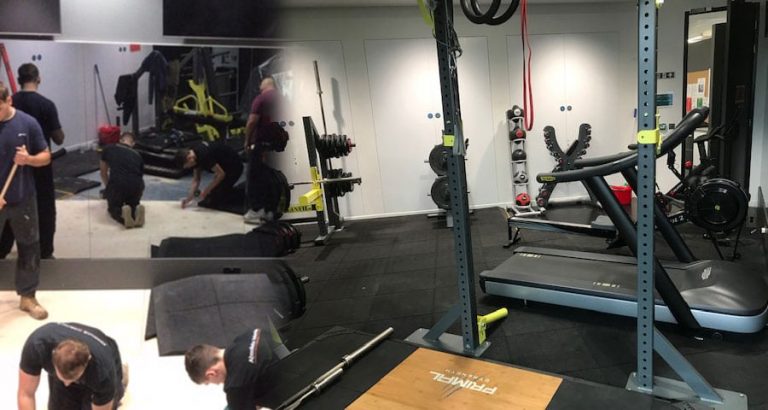
Case study from Absolute Commercial Interiors who used our black rubber tiles as gym flooring at a commercial gym
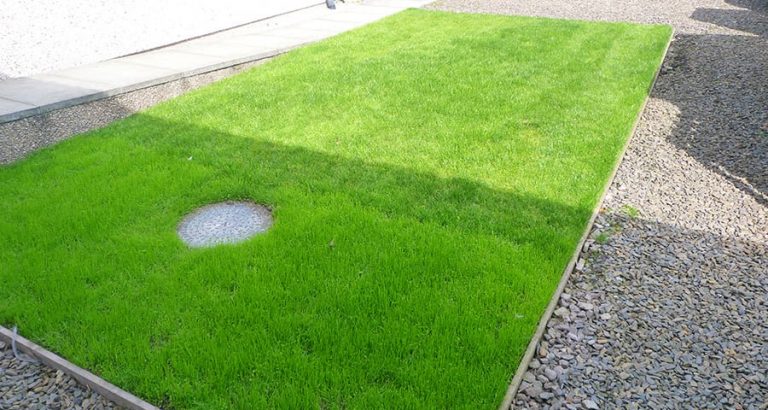
This case study shows how Tim & Janet created a strong, long lasting and attractive grass driveway using green x-grid
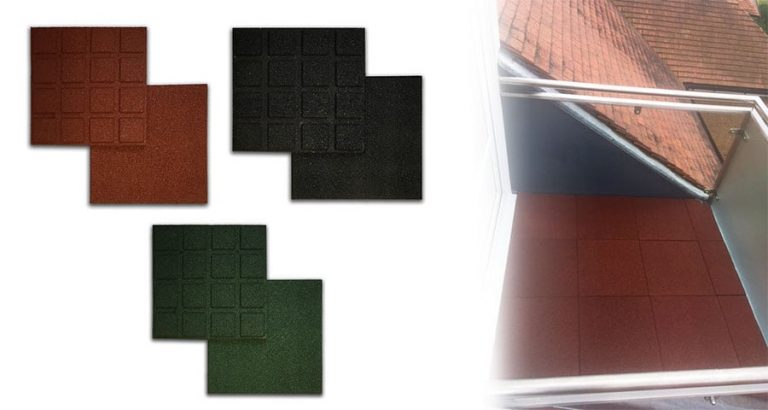
Learn more about Rubber Roof Tiles and the benefits of using them as the tiling solution for your roof