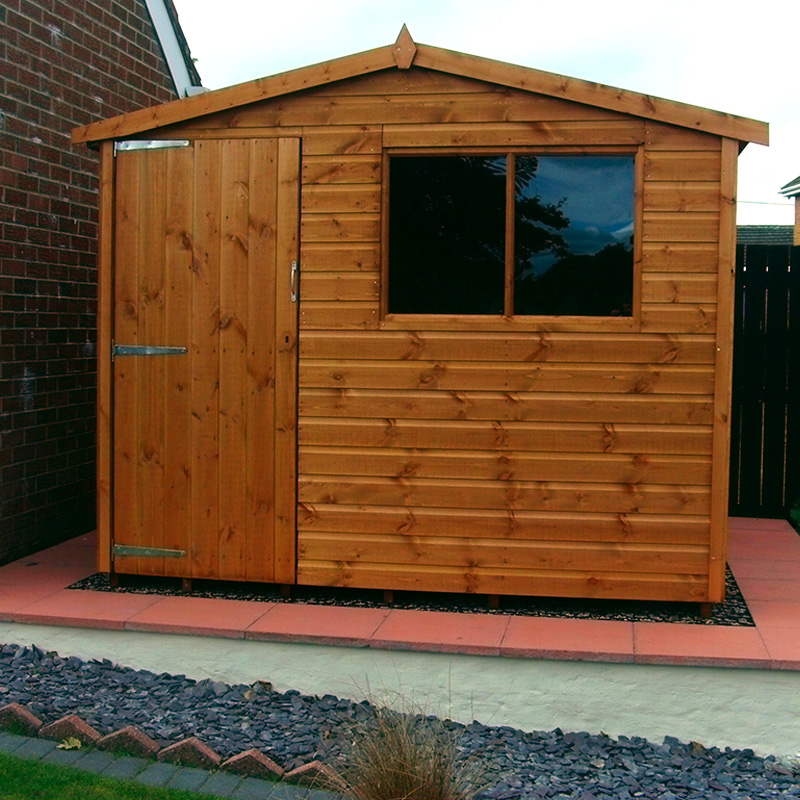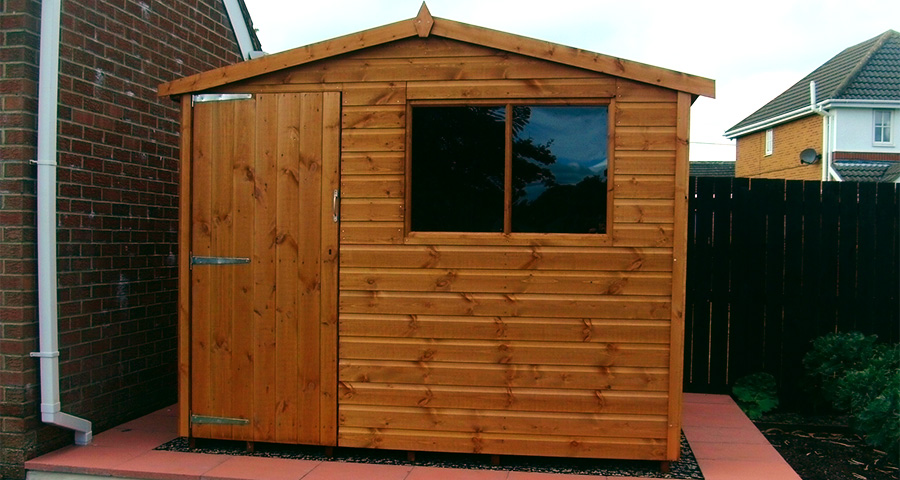
This latest case study comes from Mary and her husband who were searching for a suitable shed base after deciding to replace their old gazebo with a new wooden shed following a large landscaping project in their garden. After the purchase of the foundation, they spoke to Durham Timber Products Ltd who provided them with a fantastic 8ft x 7ft wooden shed.
“My husband and I recently landscape our garden and found the old gazebo looked out of place. We decided to replace it with a shed but found the paved platform it stood on was 3” or 4” higher at one end than the other.”
Choosing The Base
They decided to research online for alternative and easy to install foundations that could be used on their platform and would fit their non-standard size shed without purchasing more material than necessary.
Mary said: “Obviously before a shed could be ordered we needed to level the platform but found that several of the paving slabs broke when lifted so we proceeded to look online for alternative ideas. We thought that a plastic shed base would work well for us and decided to use the available old paving slabs to create a solid edge on the platform and use the plastic shed base in the centre.”
“I looked at several suppliers sites online but decided on the Plastic Shed Base Company as the price was very competitive and there was an option to purchase individual shed base panels rather than by a range of shed sizes. This suited us because at 8ft x 7ft our shed is a non-standard size and on most other sites we would have had to buy more panels than we needed.”
Mary ordered 56 plastic shed base panels along with a 1m x 12m membrane and 20 u-pins.
Laying The Base & Installing The Shed
Their order was dispatched the same day and arrived with them just two working days later meaning they could being their installation. Although installing a plastic shed base is a simple procedure, Mary had to level the concrete platform before relaying some of the concrete slabs. She described her installation process very well:
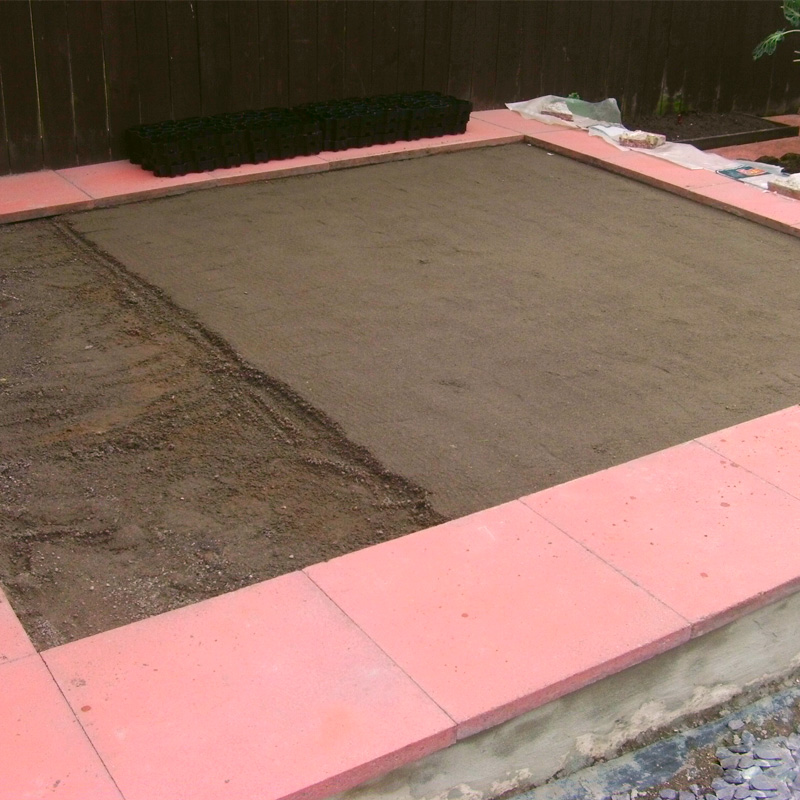
“Leveling the area and cementing the paving was a slow and heavy procedure (we are pensioners and did all the work ourselves). It was a relief to have this job completed as it proved to be the end of the difficult part of the job.
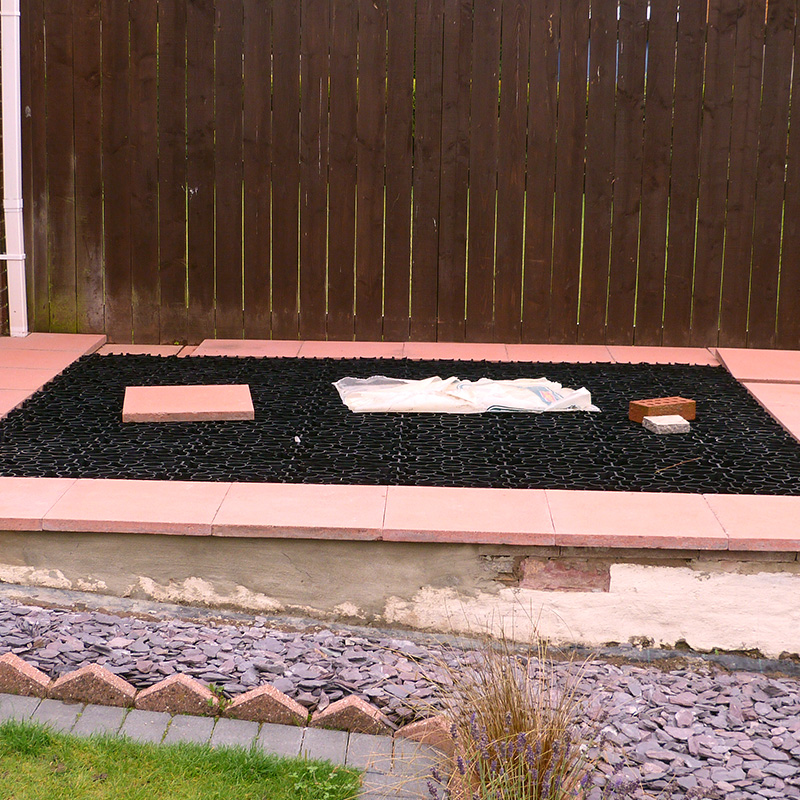
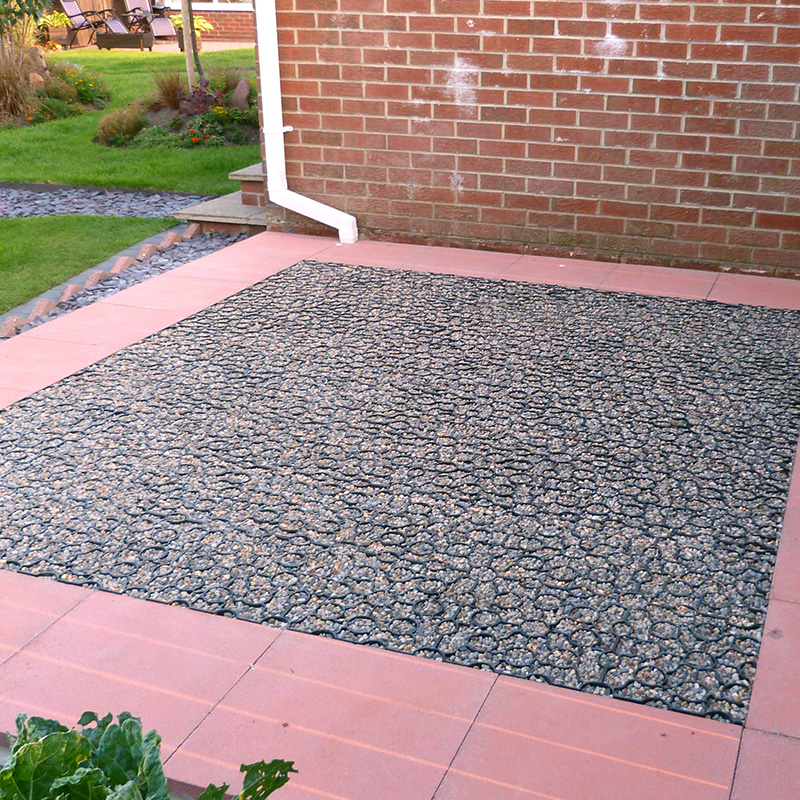
With the edges solid and level, we started by placing one section of the shed base into the centre to see how deep the sand base needed to be to give a nice level join between the shed base and the paving slabs. We then spread and levelled course sand across the area followed by a membrane and then the plastic base. To avoid the necessity to cut any of the paving slabs we had decided just to lay them full size which meant the shed base did not fit exactly into the central area but we trimmed it where necessary which gave a good tight fit and a neat edge. Finally, pea gravel was poured into the plastic base.
Our shed duly arrived and was fitted with the men doing the work complimenting us on providing such a good and level surface and saying how easy it made their job.”
Conclusion
A huge thank you to Mary and her husband for firstly, choosing to use our base and secondly, for sharing the images and details of their shed and base installation to allow us to create this case study.
Mary told us: “We are both really pleased with the appearance of the shed and its platform and are reassured that during bad weather the area under the shed has good drainage which should help to protect the shed for years to come.”
If you have any photos of your project to share with us or have any questions regarding our bases then please do not hesitate to contact us.